How to Shorten a Chandelier Chain: Quick Tips
Shortening a chandelier chain can significantly impact the overall look and functionality of your room’s lighting. Whether you’re adjusting the height to better suit your space or ensuring the chandelier doesn’t hang too low, knowing how to shorten a chandelier chain is a valuable skill. This process not only improves the aesthetic appeal of your chandelier but also enhances its safety, preventing accidents caused by a low-hanging fixture. In this guide, we’ll walk you through each step, ensuring you can shorten your chandelier chain with confidence and precision. We’ll also cover the tools you need, safety tips, and what to do if the chain ends up too short.

Why Would You Need to Shorten a Chandelier Chain?
There are several practical reasons to consider shortening your chandelier chain. First, if the chandelier hangs too low, it can become a safety hazard, especially in rooms with high traffic, such as dining rooms or entryways. A chandelier that is too low can obstruct the view, be at risk of being bumped into, or simply look out of place. Additionally, shortening the chain can help achieve better lighting coverage, as the height of the chandelier affects the distribution of light in a room. Adjusting the chain also allows you to customize the fixture to match your interior design preferences, ensuring it complements the room’s overall aesthetic. Lastly, in some cases, homeowners may need to shorten the chain to make the chandelier more proportionate to the ceiling height, particularly in rooms with lower ceilings.
Tools You’ll Need to Shorten the Chain
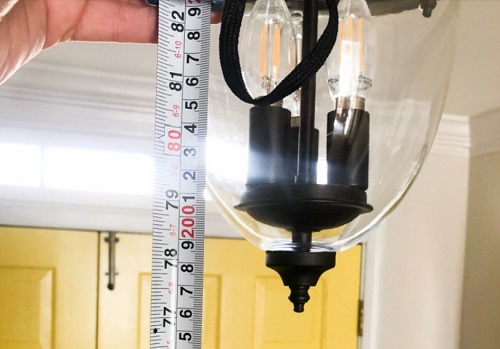
Before starting the process of shortening your chandelier chain, it’s essential to gather all the necessary tools to ensure a smooth and safe operation. The basic tools you’ll need include a sturdy ladder, which allows you to safely reach the chandelier, and pliers for gripping and twisting the chain links. A measuring tape is crucial for determining the exact length you need to remove, ensuring your chandelier hangs at the desired height. Additionally, a wire cutter will be required to trim any excess chain links after adjustment. If the chandelier’s electrical wiring needs to be shortened, wire strippers might also be necessary. Having a pair of gloves is advisable to protect your hands from sharp edges on the metal chain and to provide a better grip. By having these tools ready, you can avoid unnecessary interruptions and complete the task efficiently.
How to Shorten a Chandelier Chain Safely
Step-by-Step Guide to Shortening the Chain
To begin the process of shortening your chandelier chain, start by turning off the power to the chandelier at the circuit breaker. This step is crucial to prevent any risk of electrical shock. Next, carefully remove the chandelier from the ceiling mount. Place the chandelier on a soft, stable surface to prevent damage while you work. Use the measuring tape to determine the desired length of the chain, then mark the chain link where you plan to cut. With the wire cutter, carefully remove the excess chain, making sure to avoid damaging the remaining links. If necessary, trim the electrical wires to match the new chain length and use wire strippers to prepare the wires for reconnection. Once the chain is shortened, reattach the chandelier to the ceiling, ensuring all electrical connections are secure before turning the power back on.

Safety Tips Before and After Adjustment
Safety is paramount when working with lighting fixtures, especially chandeliers, which are often heavy and connected to electrical wiring. Before you begin, ensure the power is off to avoid any electrical accidents. Use a sturdy ladder to reach the chandelier and have a second person assist you if the chandelier is particularly heavy or awkward to handle. Wear gloves to protect your hands from sharp chain links and to provide a better grip. After shortening the chain, double-check that the chandelier is securely fastened to the ceiling mount and that all electrical connections are properly insulated. Test the chandelier by gently moving it to ensure it’s stable and doesn’t sway excessively. Once everything is secure, you can turn the power back on and enjoy your newly adjusted chandelier.
What to Do If the Chain is Too Short?
If, after shortening the chandelier chain, you find that it is too short, there are a few options to correct the issue. One solution is to purchase additional chain links from a hardware store that match the existing chain. This allows you to extend the chain back to the desired length. Alternatively, consider using a ceiling medallion, which can create the illusion of a longer chain by reducing the distance between the ceiling and the fixture. If you’ve shortened the electrical wires as well, you may need to splice in additional wire to accommodate the added chain length. This step should be done carefully to ensure a safe and secure connection. If you’re unsure about extending the wiring, it’s advisable to consult a professional electrician to avoid any potential hazards.
Will Shortening the Chain Affect the Chandelier’s Stability?
One concern that often arises when shortening a chandelier chain is whether it will affect the chandelier’s stability. Generally, shortening the chain should not compromise the stability of the chandelier, provided that all steps are performed correctly. It’s essential to ensure that the chandelier is securely fastened to the ceiling mount after the adjustment. If the chandelier was hanging on a hook, make sure the hook is still adequately rated to support the weight of the chandelier after the chain is shortened. Additionally, the chain should be evenly distributed, and the chandelier should be balanced to prevent any wobbling or swaying. If you notice any instability, check the connections and the ceiling mount to ensure everything is secure. If the chandelier still feels unstable, you may need to consult with a professional to ensure it is safely installed.
Conclusion
Learning how to shorten a chandelier chain is a valuable skill that can help you customize your home’s lighting to suit your specific needs and preferences. Whether you’re adjusting the height for aesthetic reasons, safety concerns, or better light distribution, following the steps outlined in this guide will help you achieve your desired results safely and effectively. Remember to gather all necessary tools before starting, prioritize safety throughout the process, and ensure the chandelier is securely fastened once the adjustment is complete. If any issues arise, such as the chain being too short or concerns about stability, there are straightforward solutions available to address these problems. By taking the time to properly shorten your chandelier chain, you can enhance the beauty and functionality of your lighting, making your space more comfortable and visually appealing.
FAQ
1.What tools do I need to shorten a chandelier chain?
You’ll need a sturdy ladder, pliers, a measuring tape, a wire cutter, and possibly wire strippers. Gloves are also recommended for safety.
2.How can I ensure the chandelier is level after shortening the chain?
After reattaching the chandelier, use a level to check its alignment. Adjust the chain links as needed to ensure the chandelier hangs evenly and securely.
3.Is it possible to lengthen a chandelier chain after shortening it?
Yes, you can lengthen the chain by adding additional chain links or using a ceiling medallion. If the electrical wires were shortened, you may need to splice in extra wire to accommodate the new chain length.
