How to Sew Pillow: A Beginner’s Step-by-Step Guide
Learning how to sew pillow is an excellent first project for beginners, providing a perfect blend of creativity and practicality. This guide will walk you through every step of the process, ensuring that you have a beautiful, handmade pillow by the end. Whether you’re looking to add a personal touch to your home decor or simply want to try your hand at sewing, this project is a fantastic starting point. By the time you finish, you’ll not only have a functional pillow but also a sense of accomplishment and the basic skills needed to tackle more complex sewing projects. Let’s get started by gathering all the necessary materials and preparing for your sewing journey.

What Materials Do You Need to Sew a Pillow?
Before diving into your pillow project, it’s essential to gather all the materials. You’ll need fabric that suits your style—cotton is a great choice for beginners due to its easy handling. You’ll also need thread that matches or complements your fabric, a measuring tape, fabric scissors, straight pins, and a sewing machine or a needle for hand sewing. Additionally, ensure you have stuffing or a pillow insert ready. A sewing machine can speed up the process, but hand sewing is entirely possible for this project if you prefer. Gathering all these materials beforehand will make the sewing process smooth and enjoyable.

How to Cut and Prepare Your Fabric
Measuring and Cutting Fabric
Start by determining the size of your pillow. Use a measuring tape to mark the dimensions on your fabric, adding an extra inch to each side for seam allowances. Carefully cut out two identical pieces of fabric. Accuracy is key here, as precise cuts will ensure that your pillow pieces match up perfectly during sewing. A sharp pair of fabric scissors will make this step easier, preventing frayed edges and uneven cuts. Take your time with this step, as a well-measured and cut fabric forms the foundation of a neat and professional-looking pillow.
Preparing the Fabric Edges
Once your fabric pieces are cut, it’s time to prepare the edges to prevent fraying. Fraying can weaken your seams and give your pillow an unfinished look. To avoid this, use pinking shears to trim the edges or sew a zigzag stitch along the edges of each fabric piece. This process, known as edge finishing, is especially important if your fabric is prone to unraveling. Taking the time to properly prepare your fabric edges will contribute to the overall durability and appearance of your finished pillow, ensuring it looks as good as it feels.
Step-by-Step Sewing Instructions for a Simple Pillow
Pinning and Sewing the Seams
With your fabric pieces ready, place them together with the right sides facing each other. Use straight pins to secure the edges, ensuring the fabric pieces stay aligned as you sew. Begin sewing along the edges, using a straight stitch, and remember to leave a small gap on one side for turning the pillow inside out. Backstitch at the beginning and end of your seams to lock the stitches in place. Maintaining a consistent seam allowance will ensure that your pillow has even edges and a professional finish. This step is where your pillow starts to take shape, so sew with care and attention.
Turning the Pillow Right Side Out
After sewing the seams, it’s time to turn your pillow right side out. Carefully pull the fabric through the gap you left earlier, taking your time to avoid damaging the seams. Once the pillow is right side out, use a blunt tool, such as the end of a pencil, to gently push out the corners so they are sharp and defined. This step is crucial for giving your pillow a clean, finished look. Seeing your pillow take its final shape is one of the most satisfying moments in the process.
Stuffing and Finishing Touches
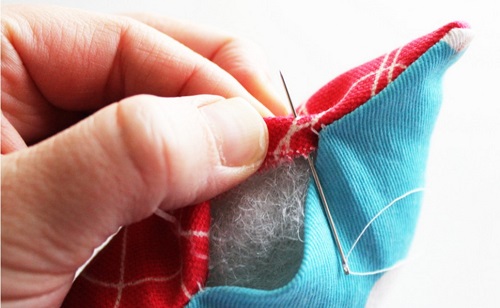
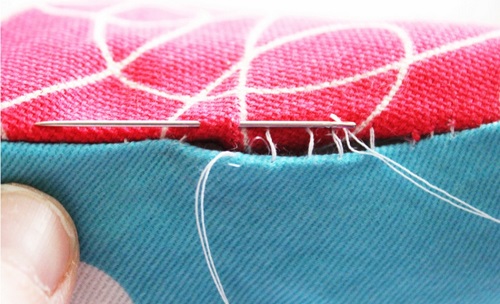
With the pillow turned right side out, it’s time to stuff it. Begin by evenly filling the pillow with stuffing, making sure to reach all corners for a consistent shape. You can adjust the firmness of your pillow by adding more or less stuffing, depending on your preference. Once you’re satisfied with the stuffing, close the gap using a ladder stitch for an invisible seam. This final touch will ensure that your pillow has a polished appearance. Taking care with the stuffing and closing process will result in a comfortable, well-formed pillow that you can be proud of.
How to Add Decorative Elements to Your Pillow?
Adding decorative elements to your pillow is where you can really let your creativity shine. Consider sewing on buttons, adding trims, or incorporating embroidery to give your pillow a unique and personalized look. You could also use fabric paint or iron-on decals to create patterns or images. These decorations not only enhance the aesthetic appeal of your pillow but also make it a one-of-a-kind piece. Be sure to choose decorations that complement your fabric and overall design theme. By adding these finishing touches, your simple pillow can be transformed into a stylish and custom accessory for your home.
Conclusion
Congratulations! You’ve learned how to sew pillow from start to finish. This project is a perfect introduction to the world of sewing, helping you develop foundational skills while creating something beautiful and functional. By following these steps, you now have a pillow that not only adds comfort to your home but also reflects your personal style. As you continue to practice, you can experiment with different fabrics, sizes, and decorative elements to create a variety of pillows that suit your taste. The skills you’ve gained here will serve you well in future sewing projects, opening up a world of creative possibilities.
FAQ
1.What type of fabric is best for sewing a pillow?
Cotton is an excellent choice for beginners due to its ease of handling and durability. For those looking to explore different textures, consider using linen, velvet, or even silk, depending on the desired look and feel of the pillow.
2.Can I sew a pillow without a sewing machine?
Absolutely! While a sewing machine makes the process faster, you can sew a pillow by hand using a basic running stitch or backstitch. Hand sewing is especially useful for small projects or adding detailed finishing touches.
3.How do I prevent the pillow edges from fraying?
To prevent fraying, you can use pinking shears, which cut the fabric in a zigzag pattern, or finish the edges with a zigzag stitch. Another option is to use a serger if available, which professionally finishes edges and prevents fraying effectively.
