A Comprehensive Guide on How to Build Suspended Shelves
Ever found yourself marveling at the sleek, modern look of suspended shelves in a magazine? Building your own might seem like a daunting task, but it’s surprisingly straightforward and budget-friendly. In fact, with a bit of time—about half a day—and a modest budget, you can elevate the look of any room by learning how to build suspended shelves. Not only do these shelves add functional storage, but they also bring a touch of sophistication and style to your space. Ready to get started? Let’s walk through the process together.

How to Build Suspended Shelves
Building suspended shelves is a rewarding DIY project that blends form and function. Whether you’re aiming to display your favorite books, houseplants, or a collection of curiosities, suspended shelves provide the perfect blend of utility and aesthetics. Let’s break down the process step by step.
What You’ll Need
Before you roll up your sleeves, let’s ensure you have all the necessary tools and materials:
Step-by-Step Guide
1. Preparing Your Space
Start by deciding where you want to install your shelves. Consider the room’s layout and how you’ll use the shelves—will they hold heavy books, or will they display lighter decorative items? This will influence both the height at which you install the shelves and the materials you choose. Measure the area carefully and make sure there’s enough space around the shelves for whatever you plan to store on them.
Next, clear the area and gather all your tools and materials. A tidy workspace is not only safer but also makes the process much more enjoyable.
2. Choosing the Right Brackets and Hardware
Choosing the right brackets is crucial for both the functionality and safety of your shelves. For heavier loads, opt for heavy-duty metal brackets or floating shelf brackets that are designed to distribute weight evenly. The hardware you select should be compatible with your wall type. For instance, drywall anchors work well on standard walls, while masonry anchors are better for brick or concrete walls.
Brackets come in various styles, from industrial to minimalist. Choose ones that complement your room’s aesthetic while providing the necessary support. Remember, the right hardware not only ensures the shelf stays up but also contributes to the overall look.
3. Locating Studs
Finding the studs in your wall is a crucial step. Studs are the vertical beams behind your drywall that provide the strongest anchor points for your shelves. Use a stud finder to locate these and mark their positions with a pencil. If you skip this step, your shelves might not be securely attached, leading to potential accidents.
If you can’t locate studs where you want your shelves, use wall anchors designed for heavy loads. However, mounting directly into studs is always the most secure option.
4. Mounting the Brackets
Now that you’ve located the studs, it’s time to mount the brackets. Start by holding the first bracket against the wall at the desired height, aligning it with a stud. Use a level to ensure it’s perfectly straight, then mark the screw holes with a pencil.
Drill pilot holes into the wall where you’ve marked, then secure the bracket with screws. Repeat this process for each bracket, ensuring they are level with one another. Proper alignment is key here—uneven brackets will result in a crooked shelf, which is not only unsightly but also less stable.
5. Attaching the Shelf
With your brackets securely mounted, you’re ready to attach the shelf. If you’re using wood, consider sanding the edges first to smooth any rough spots. You can also paint or stain the wood to match your decor, adding a personalized touch.
Place the shelf on top of the brackets, ensuring it’s centered. Depending on the design of your brackets, you may need to secure the shelf with screws. If you’re using floating brackets, they’ll likely have a locking mechanism to hold the shelf in place.
Take a step back and admire your work. Your new suspended shelves should be sturdy, level, and ready to showcase your style.

Common Mistakes to Avoid
Building suspended shelves isn’t overly complicated, but there are some common pitfalls to watch out for:
○ Ignoring the weight limits: Every bracket and wall anchor has a weight limit. Overloading your shelves can cause them to fail, so be mindful of what you place on them.
○ Skipping the stud finder: Mounting brackets directly into drywall without securing them to studs is a recipe for disaster. Always use a stud finder or appropriate wall anchors for the load.
○ Incorrect bracket spacing: Ensure your brackets are evenly spaced to distribute weight effectively. If they’re too far apart, the shelf may bow in the middle.
○ Neglecting the level: Even if your eye says the shelf is straight, always double-check with a level. A shelf that’s even slightly tilted can cause items to slide off and create an unbalanced look.
○ Choosing the wrong materials: Different environments require different materials. Wood might warp in a humid bathroom, whereas metal or glass could be more suitable.
Styling Your Suspended Shelves
Now that your shelves are securely in place, it’s time to think about styling. The way you organize and decorate your shelves can make a big impact on the overall look of your space.
1.Play with Height and Depth
Don’t be afraid to mix items of different heights and depths. Combine tall vases with shorter books, or layer framed photos with small trinkets in front. This creates visual interest and keeps your shelves from looking too flat or monotonous.
2.Use a Balanced Color Palette
Choose a color palette that complements the rest of your room’s decor. You can opt for monochrome for a sleek, modern look or mix in pops of color for a more eclectic vibe. Be mindful of the balance between the colors, ensuring that no single hue overwhelms the others.
3.Incorporate Greenery
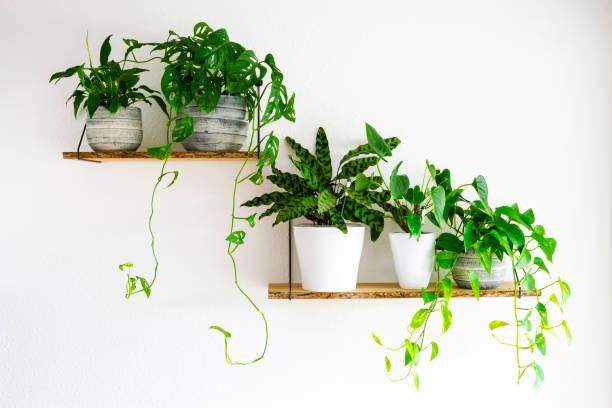
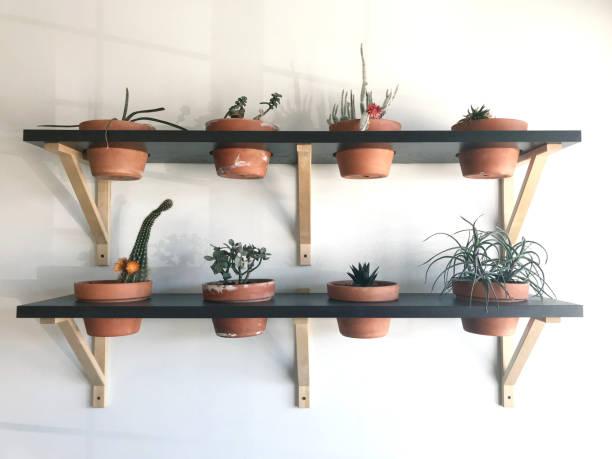
Adding plants to your shelves can bring a touch of nature indoors and add life to your display. Consider small potted succulents, trailing ivy, or a delicate fern. Not only do plants add a fresh, organic element, but they also break up the hard lines of the shelves.
4.Create Groupings
Group similar items together, like a set of books or a collection of candles, to create cohesive mini-displays within your larger shelving unit. This not only helps keep things organized but also makes the shelf look more intentional and styled.
5.Leave Some Space
It’s tempting to fill every inch of your shelves, but sometimes less is more. Leaving some negative space can make your shelves feel less cluttered and more curated. This approach can also highlight the items you do choose to display, giving them room to breathe.
Maintenance and Safety Tips
Maintaining your suspended shelves is just as important as building them. Here are some tips to keep them looking great and functioning well:
√ Regularly check for stability: Over time, screws can loosen, and materials can shift. Periodically check that your brackets and shelves are still secure, tightening screws as needed.
√ Clean with care: Depending on the material of your shelves, use appropriate cleaning methods. Dust wood shelves regularly and wipe them down with a damp cloth. For metal or glass shelves, use a cleaner suited to those materials to avoid damage.
√ Avoid overloading: Even though your shelves might feel sturdy, avoid exceeding their weight capacity. Spread out heavier items and mix them with lighter decorations to prevent stress on the brackets.
√ Be mindful of placement: Keep heavier items on lower shelves to reduce the risk of accidents. If children or pets are in the home, ensure that the shelves are placed out of reach or that they hold only non-fragile items.
Conclusion
Learning how to build suspended shelves is a practical skill that combines creativity with functionality. Whether you’re aiming to enhance your home’s decor or need additional storage, these shelves offer a versatile solution. With careful planning, the right materials, and a bit of patience, you can create beautiful, sturdy shelves that will serve your home for years to come. So, why not give it a try? Your walls—and your style—will thank you.
FAQs
How much weight can suspended shelves hold?
Suspended shelves can typically hold between 20 to 50 pounds, depending on the type of brackets and how well they’re anchored to the wall. Always check the specifications of your brackets to ensure you’re within safe limits.
Can suspended shelves be installed on any type of wall?
Yes, suspended shelves can be installed on various wall types, including drywall, plaster, and brick. However, the mounting hardware must be appropriate for the wall material to ensure secure installation.
How do you hide the mounting hardware for a cleaner look?
To achieve a cleaner look, use floating shelf brackets designed to be concealed within the shelf itself. Alternatively, choose decorative brackets that blend seamlessly with your decor, reducing the need to hide them.
What are the best materials for suspended shelves for a humid environment?
For humid environments, opt for materials like metal or tempered glass, as they are resistant to moisture. If you prefer wood, choose treated or sealed varieties like teak or bamboo that can withstand humidity better.
