How to Build Shelves in a Closet: A Step-by-Step Guide for DIY Enthusiasts
When it comes to organizing a cluttered closet, nothing beats the efficiency and convenience of custom-built shelves. Learning how to build shelves in a closet can transform your space from a chaotic mess into a well-organized haven. With a variety of materials and tools available, you can easily tailor this project to suit your budget and skill level. Whether you’re a seasoned DIY enthusiast or just getting started, adding shelves to your closet is a practical and rewarding project that delivers immediate results.

How to Build Shelves in a Closet
Building shelves in a closet might seem like a tall order, but with the right approach, it’s a straightforward process. Follow our step-by-step guide to ensure your project is a success, from the initial planning stages to the finishing touches.
Tools and Materials You Will Need
Before you begin, make sure you have all the necessary tools and materials on hand. Here’s what you’ll need:
|
Tools |
Materials: |
|
Measuring tape |
Wood or MDF boards for shelves |
|
Level |
Shelf brackets |
|
Stud finder |
Screws and wall anchors |
|
Power drill |
Wood glue |
|
Circular saw or handsaw |
Paint or stain |
|
Screwdriver |
Edge banding (optional) |
|
Pencil |
Patch and paint supplies (if necessary) |
|
Safety goggles |
|
|
Sandpaper |
Step-by-Step Instructions
1. Assessing Your Storage Needs
The first step in any shelving project is to assess what you need. Take a good look at your closet and consider what items you’ll be storing. Are you housing shoes, clothes, or heavier items like books and storage bins? The type and weight of the items will influence your shelf design.
Next, measure the available space. Use your measuring tape to get the width, height, and depth of your closet. Make sure to take into account any doors or other obstructions that might affect shelf placement. Remember, precise measurements are critical in ensuring that your shelves fit perfectly and serve their purpose effectively.

2. Designing the Shelves
With your storage needs and measurements in mind, it’s time to design your shelves. This is where creativity meets practicality. Start by sketching a layout, or if you’re more tech-savvy, use design software to visualize your plan. Consider the depth of the shelves—most closet shelves range between 12 to 18 inches deep, but this can vary depending on what you’re storing.
Also, think about the height and spacing between the shelves. Do you need more space for taller items, or are you planning to store smaller items like shoes? Adjust the spacing accordingly. If you’re building multiple shelves, make sure there’s a logical flow from top to bottom.
3. Preparing the Closet
Before you start building, you’ll need to prepare your closet. If there are existing shelves or hardware, remove them carefully. Use a screwdriver or drill to unscrew any brackets, and patch up any holes left behind. If your closet walls have seen better days, now’s the time to repaint them. A fresh coat of paint not only looks good but also gives you a clean slate to work with.
4. Measuring and Marking
Once your closet is prepped, it’s time to measure and mark for shelf placement. Use your level and measuring tape to ensure your marks are straight and even. Mark the positions for your shelf brackets on the wall, making sure to measure twice to avoid mistakes. It’s crucial to find and mark the studs in the wall, as this is where you’ll secure your brackets. If you miss the studs, your shelves might not be sturdy enough to hold heavy items.
5. Cutting the Shelves
With your measurements in hand, you can now cut your shelves to size. Whether you’re using a circular saw or a handsaw, safety is paramount. Always wear safety goggles and ensure your work area is clear of obstructions. To get straight, splinter-free cuts, use a straight edge as a guide and go slowly, letting the saw do the work. After cutting, sand the edges to smooth out any rough spots.
6. Installing the Support Brackets
Installing the support brackets is where your shelves start to take shape. Begin by drilling pilot holes into the marks you made for the brackets, then secure the brackets to the wall with screws. Use your level to check that each bracket is perfectly horizontal before tightening the screws fully. Properly aligned brackets are essential for keeping your shelves straight and level.
7. Attaching the Shelves
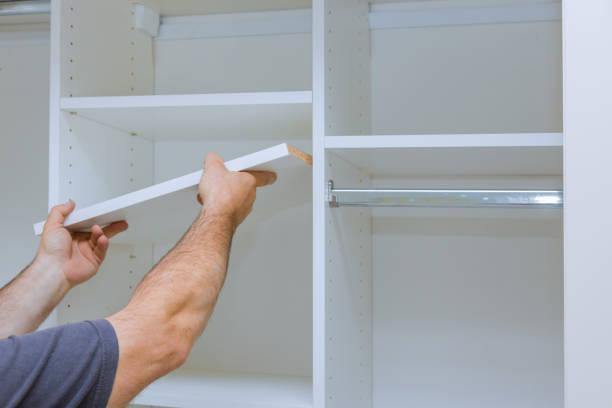
Now it’s time to attach the shelves. Place each shelf on top of the brackets, making sure they fit snugly against the wall. If you’re using wood glue, apply a small amount to the top of the brackets before setting the shelf down. This will help hold the shelf in place while you secure it with screws. For added security, consider using screws to attach the shelves to the brackets from underneath, ensuring they won’t budge even under heavy loads.
8. Finishing Touches
With the shelves installed, it’s time to add the finishing touches. If you’ve used raw wood, now’s the time to paint or stain your shelves to match your closet decor. Painting or staining not only enhances the look of your shelves but also protects the wood from moisture and wear. If you want a truly polished look, consider adding edge banding to the front of the shelves. This thin strip of material covers the exposed edges of the wood, giving your shelves a professional, finished appearance.

Common Mistakes to Avoid
Even with the best intentions, there are a few common pitfalls to watch out for:
1.Not measuring properly: Accurate measurements are the backbone of any successful DIY project. Always measure twice, cut once.
2.Using the wrong type of screws or anchors: Different wall types require different hardware. Ensure you’re using the right screws and anchors for your wall material.
3.Overloading shelves beyond their weight capacity: Even the sturdiest shelves have their limits. Be mindful of how much weight your shelves can handle, and avoid overloading them.
Conclusion
Learning how to build shelves in a closet is a valuable skill that can make a big difference in your home’s organization. By following the steps outlined in this guide, you can confidently tackle this DIY project and create a customized storage solution that meets your needs. Remember, with the right tools, materials, and a little patience, your closet can go from cluttered to clean in no time.
FAQs
What is the best material for DIY closet shelves?
The best material for DIY closet shelves is typically plywood or MDF due to their strength and ease of use. Both materials can be painted or stained to match your closet’s decor.
How deep should closet shelves be?
Closet shelves should generally be between 12 to 18 inches deep. This depth accommodates most clothing and storage boxes without intruding too much into your closet space.
Can I build shelves without drilling into studs?
Yes, you can use wall anchors designed for heavy loads if drilling into studs is not possible. However, securing shelves directly into studs is always the best option for strength.
How much weight can closet shelves hold?
The weight capacity of closet shelves depends on the material used and how well they’re supported. On average, properly installed shelves can hold between 50 to 100 pounds.
