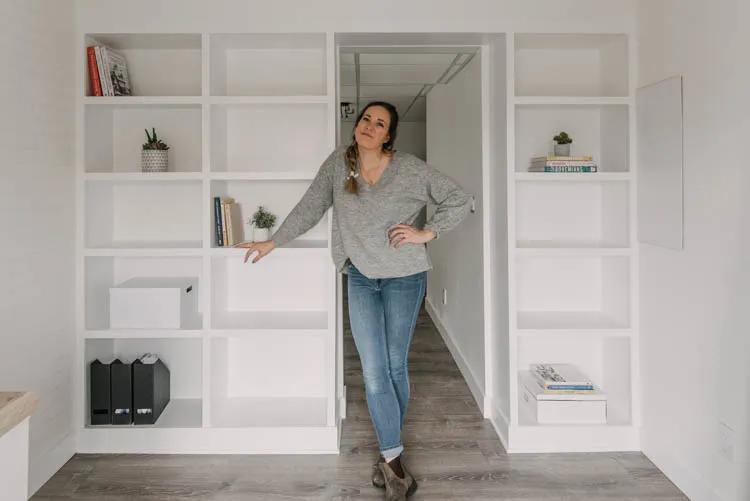
A built-in bookshelf is not only a functional addition to your home but also an elegant way to showcase your favorite books, decor, and personal items. Unlike standalone units, built-in bookshelves blend seamlessly with your home’s architecture, adding value and a custom look. Whether you’re a seasoned DIYer or just starting out, building a built-in bookshelf can be a rewarding project. This step-by-step guide will walk you through how to build a built-in bookshelf, from planning and measuring to adding the finishing touches.

Planning and Measuring for Your Built-In Bookshelf
The success of your built-in bookshelf project begins with careful planning and accurate measurements. Proper planning ensures that the final product fits perfectly within your space and meets your storage needs.
Identify the Location: Choose a wall or space in your home where the built-in bookshelf will be installed. Consider areas like alcoves, around doors, or under stairs where a built-in unit can maximize otherwise underutilized space.
Measure the Space: Measure the height, width, and depth of the area where you plan to install the bookshelf. Be sure to account for any architectural features like baseboards, moldings, or electrical outlets that might impact the design.
Sketch the Design: Draw a detailed sketch of your bookshelf, including the number of shelves, spacing between them, and any additional features like cabinets or drawers. This sketch will serve as your blueprint during construction.
Choose Your Materials: Select the type of wood and materials you’ll use. Consider factors like durability, finish, and how well the material matches your home’s existing decor. Common choices include plywood, MDF, and hardwoods like oak or maple.
Building the Base and Frame
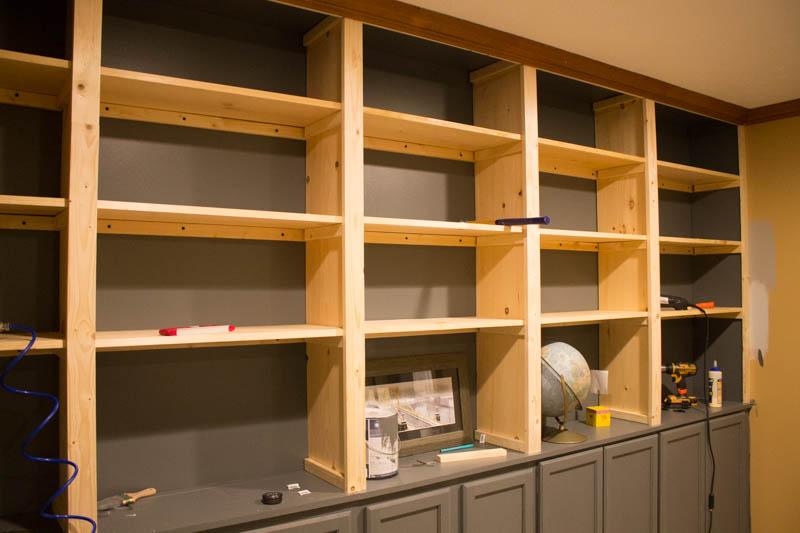
With your plan in hand, the next step is to build the base and frame of your built-in bookshelf. This provides the structure and support for the entire unit.
Construct the Base: Start by building a base platform for the bookshelf. Use 2x4s or similar lumber to create a sturdy base that matches the width and depth of your design. Secure the base to the floor using wood screws or anchors, ensuring it’s level and stable.
Build the Frame: Assemble the vertical supports (also known as the uprights) and horizontal supports (also known as the rails) that will form the frame of your bookshelf. Attach the uprights to the base using wood glue and screws, then add the rails at the top and middle for added stability.
Check for Level: Before proceeding, use a level to ensure that the frame is plumb (vertically straight) and level. Adjust as needed by shimming under the base or adjusting the position of the uprights.
Attach the Frame to the Wall: Secure the frame to the wall studs using long screws or lag bolts. This step is crucial for ensuring that the bookshelf is securely anchored and won’t tip over.
Installing the Shelves and Dividers

With the base and frame in place, you can now move on to installing the shelves and any dividers that will help organize your books and items.
Cut the Shelves: Measure and cut the shelves to fit within the frame. Use a table saw or circular saw to make clean, straight cuts. Sand the edges to remove any rough spots and ensure a smooth finish.
Install Shelf Supports: Attach shelf supports inside the frame at the desired height for each shelf. You can use wood cleats, metal brackets, or adjustable shelf pins depending on your design preference.
Place the Shelves: Slide the shelves into place on the supports. Ensure each shelf is level and secure. If using fixed shelves, you can screw them into the supports from underneath for added stability.
Add Dividers (Optional): If your design includes vertical dividers, cut and install them between the shelves. These can be used to create separate compartments for books, decor, or other items. Secure the dividers with wood glue and nails or screws.
Adding Trim, Molding, and Finishing Touches
The final step in building your built-in bookshelf is adding the trim, molding, and other finishing touches that give the unit a polished, professional appearance.
Install Trim and Molding: Attach trim around the edges of the bookshelf to cover any gaps between the unit and the wall. Crown molding at the top and baseboard trim at the bottom can give the bookshelf a built-in, custom look. Use a miter saw to cut the trim at precise angles for a seamless fit.
Fill Gaps and Holes: Use wood filler to fill any gaps, nail holes, or seams in the bookshelf. Once the filler dries, sand the area smooth to create a flawless surface.
Prime and Paint: Apply a coat of primer to the entire bookshelf, especially if you’re using MDF or another material that needs sealing. After the primer dries, paint the bookshelf in your desired color, using a high-quality brush or roller for a smooth finish. For a natural wood look, you can apply a stain and clear finish instead.
Add Hardware (Optional): If your bookshelf includes cabinets or drawers, now is the time to install the hardware, such as knobs, pulls, or hinges. Choose hardware that complements the overall style of your bookshelf and room decor.
Conclusion
Building a built-in bookshelf is a fulfilling project that adds both functionality and style to your home. By following these steps, you can create a custom bookshelf that fits your space perfectly and showcases your books and decor beautifully. Whether you’re looking to enhance your living room, office, or any other space, a well-built bookshelf can serve as both a storage solution and a focal point in your home. With careful planning, precise measurements, and attention to detail, you’ll have a built-in bookshelf that not only looks great but also stands the test of time.
FAQs
What type of wood should I use for a built-in bookshelf?
The type of wood you choose depends on your budget and desired finish. Plywood or MDF are budget-friendly options that are easy to work with and paint. For a more luxurious, natural look, consider hardwoods like oak, maple, or cherry. These woods are durable and can be stained to highlight their natural grain.
How do I ensure my bookshelf is level and stable?
To ensure your bookshelf is level and stable, start by building a solid base and frame. Use a level to check that the base is even before securing it to the floor. When assembling the frame, make sure it’s plumb and attach it securely to wall studs. Proper anchoring to the wall is key to preventing the bookshelf from tipping over.
Can I install a built-in bookshelf on an uneven wall?
Yes, you can install a built-in bookshelf on an uneven wall, but it requires careful planning. Use shims to level the base and frame during installation. Custom trim and molding can be used to cover any gaps between the bookshelf and the wall, giving the unit a seamless, built-in appearance despite the uneven surface.


